If you’re like me and can’t decide between cheesecake and ice cream cake, you’re going to fall in love with this recipe. I’ve found the perfect way to combine both into one dreamy dessert—my cheesecake ice cream cake.
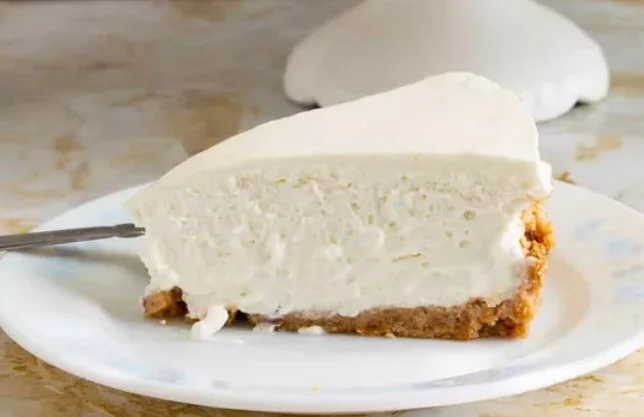
It’s rich, creamy, and chilled to perfection. I love serving this on hot days when I want something indulgent but refreshing. The layers of tangy cheesecake and sweet, creamy ice cream are a match made in dessert heaven.
Whether it’s for a summer party or just a treat-yourself moment, this cake always hits the spot. Let me show you how I make it from scratch at home—no bakery needed!
How To Make Cheesecake Ice Cream Cake Recipe
🕒 Prep Time: 30 minutes
🕒 Freeze Time: 6 hours (or overnight)
🕒 Total Time: 6 hours 30 minutes
🍰 Yield: 10–12 slices
🍽️ Course: Dessert
🌟 Difficulty: Easy
🌎 Cuisine: American
🧰 Equipment You’ll Need:
- 9-inch springform pan
- Mixing bowls
- Electric mixer or hand whisk
- Rubber spatula
- Parchment paper
- Food processor (or rolling pin for crushing cookies)
🛒 Ingredients:
For the crust:
- 1 ½ cups graham cracker crumbs
- ¼ cup granulated sugar
- ½ cup unsalted butter, melted
For the no-bake cheesecake layer:
- 2 (8 oz) blocks cream cheese, softened
- ½ cup powdered sugar
- 1 tsp vanilla extract
- 1 cup heavy whipping cream, whipped to stiff peaks
For the ice cream layer:
- 1.5 quarts vanilla ice cream (softened, not melted)
Optional toppings:
- Crushed cookies
- Fresh berries
- Caramel or chocolate drizzle
- Whipped cream
👩🍳 Step-by-Step Instructions:
Step 1: Make the crust
I start by combining the graham cracker crumbs, sugar, and melted butter in a bowl. I mix it until the crumbs are evenly coated, then press the mixture firmly into the bottom of a parchment-lined springform pan. I pop it in the freezer for about 15 minutes to firm up.
Step 2: Prepare the cheesecake layer
In a large bowl, I beat the softened cream cheese with powdered sugar and vanilla until smooth. Then I gently fold in the whipped cream until everything’s creamy and airy. I spread this mixture evenly over the chilled crust and smooth the top. Back in the freezer it goes for about 1 hour.
Step 3: Add the ice cream layer
Once the cheesecake layer is set, I spoon the softened vanilla ice cream over it. I smooth it into an even layer and freeze the whole cake for at least 4–6 hours, or overnight for best results.
Step 4: Decorate and serve
Before serving, I let the cake sit at room temperature for 5–10 minutes so it’s easier to slice. Then I decorate with whipped cream, fresh berries, or a drizzle of chocolate syrup—whatever I’m in the mood for!
✅ Helpful Tips
1. Soften Ice Cream Properly:
Let your ice cream sit at room temperature for about 10–15 minutes before layering. It should be soft enough to spread but not melted.
2. Use a Springform Pan:
A springform pan makes it super easy to release the cake cleanly without ruining those beautiful layers.
3. Freeze Between Layers:
Make sure each layer is fully set before adding the next one. This keeps the layers neat and defined.
4. Use Whipped Cream for Volume:
Folding in whipped cream makes the cheesecake layer lighter and easier to cut, especially when frozen.
5. Line the Pan:
Lining the bottom with parchment paper makes transferring the cake to a serving plate way easier.
🍰 Tasty Variations
1. Strawberry Swirl Cheesecake Ice Creaam Cake:
Add a swirl of strawberry jam or fresh chopped strawberries into both the cheesecake and ice cream layers.
2. Chocolate Lover’s Dream:
Use crushed chocolate cookies for the crust, add cocoa powder to the cheesecake layer, and use chocolate ice cream on top.
3. Oreo Cheesecake Ice Cream Cake:
Mix crushed Oreos into the cheesecake filling and use cookies and cream ice cream for the top. I always top it with extra Oreo crumbs!
4. Lemon Berry Version:
Add lemon zest and a touch of juice to the cheesecake layer, and use berry-flavored ice cream for a fruity twist.
5. Peanut Butter-Chocolate Combo:
Stir in a few tablespoons of peanut butter into the cheesecake layer and top with chocolate or peanut butter ice cream. Drizzle with melted peanut butter and mini chocolate chips before serving.
6. Birthday Party Style:
Use funfetti ice cream and fold rainbow sprinkles into the cheesecake layer for a colorful, kid-friendly version.
🍽️ Nutrition Facts (Per Serving – 1 slice out of 12)
- Calories: 410
- Total Fat: 28g
- Saturated Fat: 17g
- Trans Fat: 0g
- Cholesterol: 85mg
- Sodium: 210mg
- Total Carbohydrates: 34g
- Dietary Fiber: 1g
- Sugars: 23g
- Protein: 6g
- Calcium: 10% DV
- Iron: 4% DV
- Vitamin A: 15% DV
- Vitamin C: 0% DV
❄️ How to Store Cheesecake Ice Cream Cake
Here’s how I store my cheesecake ice cream cake to keep it fresh, firm, and delicious every time:
- 1. Keep It Frozen:
Since it’s part ice cream, I always store the cake in the freezer. It should stay solid and creamy without getting icy if properly wrapped. - 2. Use Plastic Wrap + Foil:
Once the cake is fully frozen, I wrap the entire springform pan or cake (if removed) tightly in plastic wrap, then a layer of foil. This helps prevent freezer burn and keeps out unwanted odors. - 3. Store in an Airtight Container (Optional):
If I have leftovers or want to store individual slices, I place them in an airtight freezer-safe container. It’s great for grabbing a quick dessert later! - 4. Label with the Date:
I like to write the date on the foil so I know how long it’s been stored. For best taste and texture, I try to eat it within 2 weeks.
Note
Make sure to let each layer freeze completely before adding the next to keep the cake firm and well-structured. Use a springform pan for easy removal and neat presentation. I always let the cake sit at room temperature for 10–15 minutes before slicing—it makes cutting much easier.
Feel free to swap flavors of ice cream or add mix-ins like crushed cookies, chocolate chips, or fruit to make it your own!
FAQ
Can I make this cheesecake ice cream cake ahead of time?
I usually make it a day in advance so the layers have time to set properly. It actually tastes better once it’s had time to freeze overnight.
Do I need an ice cream maker for this recipe?
I just use store-bought ice cream and soften it slightly before layering. No fancy equipment needed—just a freezer and some patience!
Can I use different flavors of ice cream?
I love switching things up. Strawberry, cookies & cream, chocolate chip, or even pistachio work beautifully. Just pick your favorite!
Can I make it gluten-free?
Just swap the graham cracker crumbs with gluten-free cookies or graham-style crackers, and make sure your ice cream and other ingredients are certified gluten-free.
Can I make it dairy-free or vegan?
Use dairy-free cream cheese and plant-based whipped topping, and choose a vegan ice cream. The texture may be slightly softer, but it’ll still be delicious.
How do I keep the layers from mixing together?
I always freeze each layer until firm before adding the next. That’s the key to clean, distinct layers that look as good as they taste.
What’s the best way to slice it?
I run a sharp knife under hot water, dry it, then slice. It glides through the frozen layers much easier that way.
Conclusion
This cheesecake ice cream cake has become one of my favorite desserts to make, especially when I want something that’s both rich and refreshing. I love how the creamy cheesecake pairs perfectly with the cool, sweet ice cream—it’s like the best of both worlds in one bite.
It’s simple to put together, easy to freeze ahead, and always makes people smile. Whether you’re serving it for a party or sneaking a slice for yourself (like I do), it’s a dessert that never disappoints. Try it once, and I promise—it’ll earn a spot in your dessert rotation.
Cheesecake Ice Cream Cake Recipe
Ingredients
Equipment
Method
- I start by combining the graham cracker crumbs, sugar, and melted butter in a bowl. I mix it until the crumbs are evenly coated, then press the mixture firmly into the bottom of a parchment-lined springform pan. I pop it in the freezer for about 15 minutes to firm up.
- In a large bowl, I beat the softened cream cheese with powdered sugar and vanilla until smooth. Then I gently fold in the whipped cream until everything’s creamy and airy. I spread this mixture evenly over the chilled crust and smooth the top. Back in the freezer it goes for about 1 hour.
- Once the cheesecake layer is set, I spoon the softened vanilla ice cream over it. I smooth it into an even layer and freeze the whole cake for at least 4–6 hours, or overnight for best results.
- Before serving, I let the cake sit at room temperature for 5–10 minutes so it’s easier to slice. Then I decorate with whipped cream, fresh berries, or a drizzle of chocolate syrup—whatever I’m in the mood for!