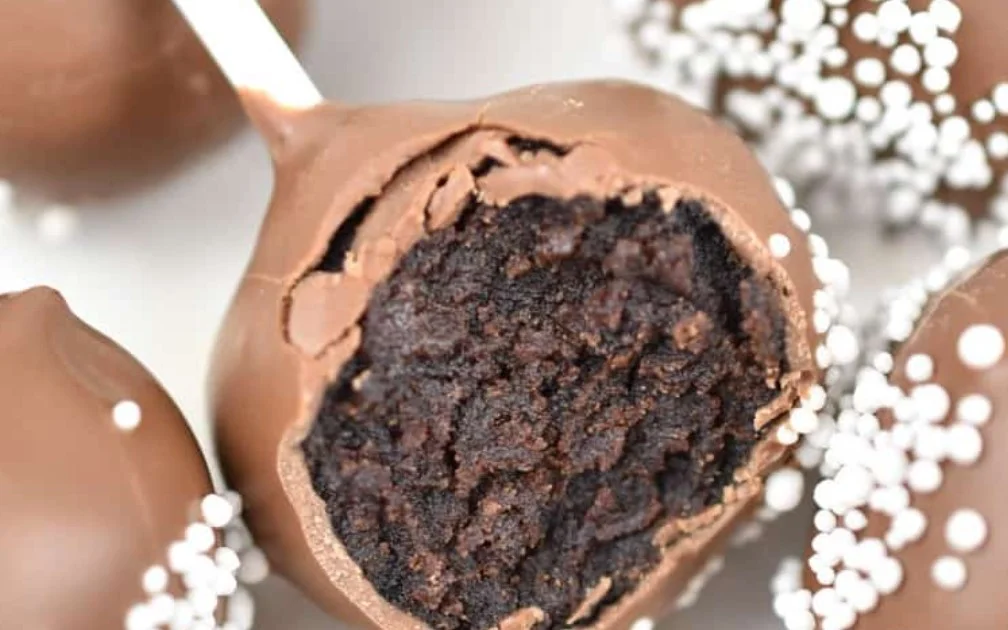
There’s something magical about biting into a Starbucks chocolate cake pop. The rich, moist chocolate center wrapped in a sweet candy coating always satisfies my sweet tooth.
But spending money on them each time I crave one? Not ideal. So I decided to recreate them at home—and let me tell you, they turned out even better than I expected.
These little treats are perfect for parties, gifting, or just an everyday indulgence. If you’ve ever wondered how to make them from scratch, you’re in the right place. I’m sharing every single step I followed to get them just right.
How To Prepare Starbucks Chocolate Cake Pop Recipe?
- 🕒 Prep Time: 25 minutes
- 🔥 Cook Time: 30 minutes
- ⏳ Total Time: 55 minutes
- 🍰 Course: Dessert
- 💪 Difficulty: Easy
- 🌍 Cuisine: American
- 🍡 Yield: About 20 cake pops
🧁 Equipment Needed
- Mixing bowls
- Electric mixer or whisk
- Baking pan (8-inch round or square)
- Parchment paper
- Cooling rack
- Food processor (optional, for even crumbs)
- Cake pop sticks
- Microwave-safe bowl (for melting chocolate)
- Styrofoam block or cake pop stand (for drying)
📝 Ingredients
For the Cake:
- 1 cup all-purpose flour
- ½ cup unsweetened cocoa powder
- 1 tsp baking powder
- ½ tsp baking soda
- ¼ tsp salt
- ½ cup granulated sugar
- ½ cup brown sugar
- 2 large eggs
- ½ cup vegetable oil
- ½ cup buttermilk
- 1 tsp vanilla extract
For the Frosting (binder):
- ¼ cup cream cheese (softened)
- 2 tbsp unsalted butter (softened)
- ¾ cup powdered sugar
- 1 tsp vanilla extract
For Coating:
- 2 cups semi-sweet or dark chocolate chips
- 1 tbsp coconut oil (optional, for smoother coating)
- Sprinkles or mini chocolate chips (optional)
🍫 How to Make Starbucks Chocolate Cake Pops
1. Bake the Chocolate Cake
I started by preheating my oven to 350°F (175°C). I greased and lined my baking pan with parchment paper. In a bowl, I whisked together the flour, cocoa powder, baking powder, baking soda, and salt.
In another bowl, I beat the eggs with both sugars until creamy. I added oil, buttermilk, and vanilla, then slowly combined everything into a smooth batter.
I poured the batter into the pan and baked it for about 30 minutes. Once a toothpick came out clean, I let the cake cool completely.
2. Crumble the Cake
Once cooled, I crumbled the cake with my hands until it looked like fine crumbs. For a smoother texture, I used a food processor—but that part’s totally up to you.
3. Mix with Frosting
In a separate bowl, I whipped the softened cream cheese, butter, vanilla, and powdered sugar until smooth.
I added the frosting to the cake crumbs a little at a time. I mixed it all until I could press the mixture into a firm ball without it crumbling.
4. Shape and Chill
I rolled the mixture into small balls (about 1.5 inches wide) and placed them on a lined tray. Then I popped them in the freezer for 15 minutes.
5. Insert Sticks
I melted a small amount of chocolate and dipped the end of each stick into it before inserting it into the cake balls. This helped keep the sticks secure.
I chilled them again for 10 minutes.
6. Coat with Chocolate
I melted the rest of the chocolate chips with coconut oil in 30-second bursts in the microwave. Once smooth, I dipped each cake pop until fully coated. I gently tapped off the excess and added sprinkles.
I placed them upright in a Styrofoam block and let them set.
🧮 Nutrition Facts (Per Cake Pop)
- Calories: 190
- Fat: 11g
- Carbohydrates: 22g
- Sugar: 15g
- Protein: 2g
- Fiber: 1g
Nutrition may vary based on coating and size.
🍽️ Serving Suggestions
I like serving these chilled—they taste just like the Starbucks ones. For birthdays, I decorate them with colorful sprinkles or drizzle them with white chocolate. For holidays, I wrap them in cellophane and tie with ribbon. They always impress.
💡 Tips and Variations
- Flavor twist: Add a drop of peppermint or almond extract to the frosting for a different vibe.
- Use boxed mix: If you’re short on time, a chocolate cake mix works too.
- White chocolate dip: White chocolate makes a great coating if you want that clean Starbucks look.
- No cream cheese? You can use buttercream instead.
🥗 Health Benefits
Okay—these are definitely a treat. But making them at home means I control the ingredients. No preservatives or artificial flavors. Plus, the portion size helps with mindful snacking. And chocolate? It boosts my mood every single time.
📝 Note
I always chill the cake pops before dipping. It helps them stay on the stick and keeps the coating smooth. Also, using a little coconut oil makes the chocolate glossier and easier to work with.
❓ FAQ
Can I use boxed cake mix instead of making the cake from scratch?
Yes, absolutely. I’ve done that when I needed a shortcut. Just make sure to cool it completely before crumbling. It still turns out delicious.
How do I keep the cake pops from falling off the sticks?
I always dip the tip of each stick in melted chocolate before inserting it into the cake balls. Then I chill them for at least 10 minutes. That seals the bond and holds everything together.
Can I freeze cake pops?
Yes, I freeze them after they’re fully dipped and dried. I wrap each one in plastic and store them in an airtight container. They last for up to 6 weeks. I just thaw them in the fridge before serving.
Why is my chocolate coating cracking?
That usually happens when the cake pop is too cold, and the melted chocolate is too hot. I let my pops rest for a minute or two out of the freezer before dipping to avoid that sudden temperature shock.
Can I make these without cream cheese?
Yes. I’ve swapped in buttercream frosting before, and it worked fine. The texture might be a little softer, but the flavor is still amazing.
What chocolate is best for dipping?
I like using semi-sweet chocolate chips with a little coconut oil. Candy melts work too if I want that smooth, Starbucks-style finish. Just make sure the coating isn’t too thick.
How long do homemade cake pops last?
I keep them in the fridge for up to 5 days. For longer storage, I freeze them. They taste best within the first few days while they’re still super moist.
✅ Conclusion
Making these Starbucks chocolate cake pops at home felt like a win for both my taste buds and my wallet. I got to play with flavors, control the sweetness, and enjoy every bite knowing exactly what went into them. They’re fun to make, easy to customize, and always a crowd-pleaser.
Once I tried this recipe, I never felt the need to grab one from the coffee shop again. If you’re craving something rich, chocolatey, and downright adorable—these cake pops have you covered. So go ahead, roll up your sleeves and make a batch. I promise, you won’t regret it.
Starbucks Chocolate Cake Pop Recipe
Ingredients
Equipment
Method
- I started by preheating my oven to 350°F (175°C). I greased and lined my baking pan with parchment paper. In a bowl, I whisked together the flour, cocoa powder, baking powder, baking soda, and salt.
- In another bowl, I beat the eggs with both sugars until creamy. I added oil, buttermilk, and vanilla, then slowly combined everything into a smooth batter.
- I poured the batter into the pan and baked it for about 30 minutes. Once a toothpick came out clean, I let the cake cool completely.
- Once cooled, I crumbled the cake with my hands until it looked like fine crumbs. For a smoother texture, I used a food processor—but that part’s totally up to you.
- In a separate bowl, I whipped the softened cream cheese, butter, vanilla, and powdered sugar until smooth.
- I added the frosting to the cake crumbs a little at a time. I mixed it all until I could press the mixture into a firm ball without it crumbling.
- I rolled the mixture into small balls (about 1.5 inches wide) and placed them on a lined tray. Then I popped them in the freezer for 15 minutes.
- I melted a small amount of chocolate and dipped the end of each stick into it before inserting it into the cake balls. This helped keep the sticks secure.
- I chilled them again for 10 minutes.
- I melted the rest of the chocolate chips with coconut oil in 30-second bursts in the microwave. Once smooth, I dipped each cake pop until fully coated. I gently tapped off the excess and added sprinkles.
- I placed them upright in a Styrofoam block and let them set.