I have always believed that the best desserts are the ones that feel homemade and a little rustic. There’s something so comforting about a flaky crust and sweet, bubbling fruit.
Whenever I need a dessert that impresses a crowd without a lot of fuss, I reach for my favorite cherry slab pie recipe. It has everything I love — a buttery, crisp crust, juicy cherries, and a hint of sweetness. I find it much easier to make than a traditional round pie.
Plus, it slices beautifully into squares, making it perfect for gatherings. I love how versatile and simple it is. Whether for a family party or a casual picnic, this pie always steals the show. You will love it too.
Why You Will Love This Recipe?
I love this cherry slab pie recipe because it’s everything a dessert should be — simple, stunning, and downright delicious. It feeds a crowd without any extra fuss, and the crust comes together easily without the pressure of making a perfect round pie.
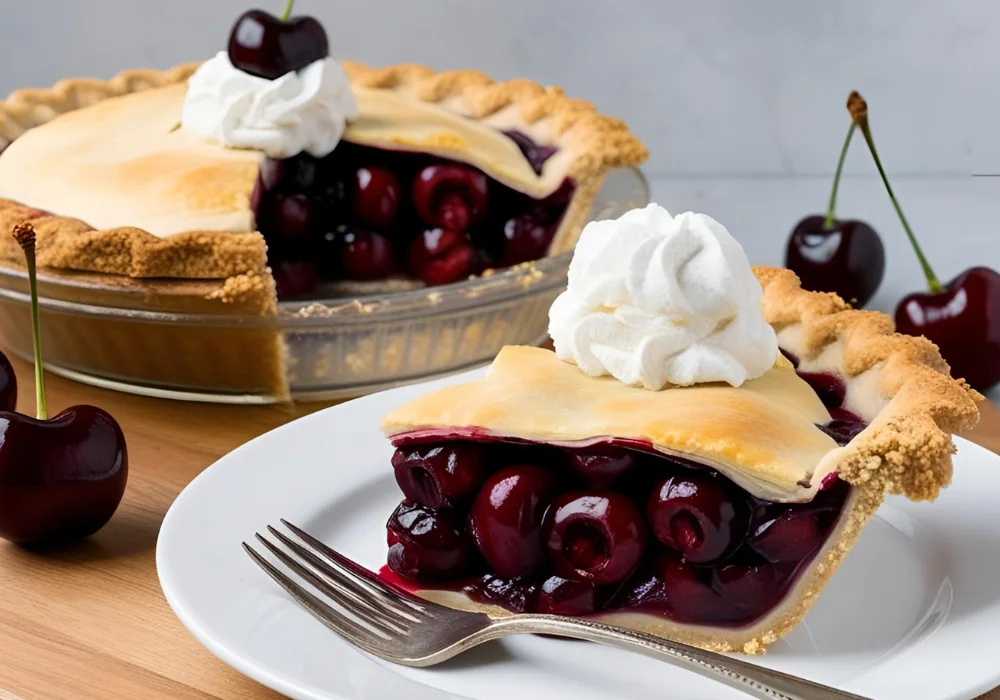
The filling bursts with sweet, juicy cherries, perfectly balanced by a hint of lemon and vanilla, while the golden, buttery crust adds just the right amount of crunch. I can even make parts of it ahead of time, which is a lifesaver when I’m hosting.
Whether I’m serving it fresh out of the oven with a scoop of vanilla ice cream or letting it shine on its own, this pie always brings smiles and second helpings. Once you bake it, you’ll see exactly why it’s a recipe I keep coming back to.
How To Prepare Cherry Slab Pie Recipe?
Quick Facts
Preparation Time: 30 minutes
Cooking Time: 45 minutes
Total Time: 1 hour 15 minutes
Course: Dessert
Difficulty: Easy
Cuisine: American
Yield: 12-16 servings
Equipment Needed
- Mixing bowls
- Rolling pin
- 10×15-inch jelly roll pan (or rimmed baking sheet)
- Pastry brush
- Sharp knife or pastry cutter
- Measuring cups and spoons
- Fork
- Cooling rack
Ingredients
For the crust:
- 2 ½ cups all-purpose flour
- 1 teaspoon salt
- 1 tablespoon sugar
- 1 cup unsalted butter, cold and cubed
- 6-8 tablespoons ice water
For the filling:
- 6 cups fresh or frozen cherries, pitted
- 1 cup granulated sugar
- ¼ cup cornstarch
- 1 tablespoon lemon juice
- 1 teaspoon vanilla extract
- ¼ teaspoon almond extract (optional)
- 1 tablespoon butter, cut into small pieces
For assembly:
- 1 egg, beaten (for egg wash)
- 1 tablespoon coarse sugar (for sprinkling)
How to Make Cherry Slab Pie
1. Prepare the crust
I start by whisking together the flour, salt, and sugar in a large bowl. Then, I cut in the cold butter until the mixture looks like coarse crumbs. I add ice water, one tablespoon at a time, mixing gently until the dough holds together when pressed.
I split the dough into two pieces, shape them into discs, wrap them tightly, and chill them in the fridge for at least 30 minutes.
2. Make the cherry filling
While the dough chills, I stir together the cherries, sugar, cornstarch, lemon juice, vanilla, and almond extract in a bowl. If I’m using frozen cherries, I make sure to thaw and drain them first to avoid excess moisture.
3. Roll out the dough
Once chilled, I roll out one disc of dough on a floured surface into a rectangle large enough to fit the bottom and sides of my pan. I carefully transfer it to the pan, pressing it into the corners and trimming any overhang.
4. Fill the pie
I pour the cherry filling evenly into the crust and dot the top with small pieces of butter for extra richness.
5. Add the top crust
I roll out the second disc of dough and either lay it over whole or cut it into strips for a lattice design. I seal the edges by pressing with a fork and brush the top with beaten egg. I sprinkle coarse sugar over the crust for a beautiful sparkle.
6. Bake
I bake the pie in a preheated 375°F (190°C) oven for 40-45 minutes, or until the crust is golden brown and the filling is bubbling. If the edges brown too quickly, I cover them with foil.
7. Cool and serve
I let the pie cool completely on a rack before slicing. This gives the filling time to set properly.
Nutrition Facts (Per Serving)
- Calories: 310 kcal
- Carbohydrates: 45g
- Protein: 3g
- Fat: 14g
- Saturated Fat: 8g
- Cholesterol: 40mg
- Sodium: 150mg
- Fiber: 2g
- Sugar: 26g
Serving Suggestions
When I serve my cherry slab pie recipe, I love to add a scoop of vanilla ice cream or a dollop of whipped cream.
For a brunch event, I might drizzle it lightly with a simple glaze made from powdered sugar and milk for a sweeter touch. It’s perfect slightly warm, but just as delicious at room temperature.
Tips and Variations
- Use different fruits: I sometimes mix in blueberries or raspberries for a colorful twist.
- Make ahead: I often make the crust a day ahead to save time.
- Lattice topping: A lattice top not only looks beautiful but also helps the filling vent and thicken properly.
- Gluten-free option: I’ve swapped in a gluten-free flour blend with great results.
- Frozen cherries: When fresh cherries aren’t in season, frozen ones work just fine; I just make sure to thaw and drain them really well.
Health Benefits
Even though this cherry slab pie recipe is definitely a treat, I love knowing that it brings a few surprising health benefits too.
Cherries are packed with antioxidants like anthocyanins and vitamin C, which help fight inflammation and support my immune system.
They’re also a great natural source of fiber, helping with digestion and keeping me feeling full a little longer.
Plus, cherries have been linked to better sleep thanks to their natural melatonin content, which is a nice bonus after a big meal.
Using real fruit instead of canned filling means I’m getting more nutrients and less processed sugar, which always makes me feel a little better about going back for a second slice!
Note
If I notice the filling is a little runny after baking, I just let the pie sit longer. It firms up beautifully as it cools. And if the top crust tears while transferring, I patch it up – rustic pies are always charming and still taste incredible!
Conclusion
This cherry slab pie recipe has quickly become one of my go-to desserts whenever I need something easy, crowd-pleasing, and full of homemade charm.
I love how the buttery crust pairs with the sweet-tart cherry filling, creating a slice that’s both comforting and irresistible.
It’s the kind of recipe that feels special but doesn’t require a ton of effort, which is exactly the kind of baking I enjoy the most.
Whether you’re making it for a holiday, a summer picnic, or just because you’re craving something sweet, I know this pie will win you over the same way it did for me.
Cherry Slab Pie Recipe
Equipment
Method
- 2 ½ cups all-purpose flour
- 1 teaspoon salt
- 1 tablespoon sugar
- 1 cup unsalted butter, cold and cubed
- 6-8 tablespoons ice water
- 6 cups fresh or frozen cherries, pitted
- 1 cup granulated sugar
- ¼ cup cornstarch
- 1 tablespoon lemon juice
- 1 teaspoon vanilla extract
- ¼ teaspoon almond extract (optional)
- 1 tablespoon butter, cut into small pieces
- 1 egg, beaten (for egg wash)
- 1 tablespoon coarse sugar (for sprinkling)