There’s something about apple pie jar recipe that always makes me feel at home. The warm cinnamon scent, the buttery crust, and the sweet-tart apple filling bring back cozy memories of fall afternoons and holiday dinners.
But I don’t always want to bake a full pie. That’s why I came up with this Apple Pie Jar recipe. It gives me all the comfort and flavor of classic apple pie—just in a fun, portable, and perfectly portioned way.
I love making these for parties, gifts, or even a quiet night when I want a little something sweet. They’re cute, easy to prep, and packed with that nostalgic pie goodness in every bite.
What Is Apple Pie In A Jar Filling?
Apple pie in a jar filling is just like the classic apple pie filling I’d use in a traditional pie, but made to fit perfectly into small mason jars. I cook chopped apples with warm spices like cinnamon, a bit of sugar, and a thickener like flour to create a rich, gooey texture.
I also like to add a splash of lemon juice to brighten up the flavor and sometimes toss in chopped dates or a touch of vanilla for extra depth. The filling turns soft and sweet, with just the right balance of tartness.
It’s cozy, flavorful, and exactly what I want in every bite of apple pie—just in a cuter, more convenient form.
What To Do With Apple Pie In A Jar?
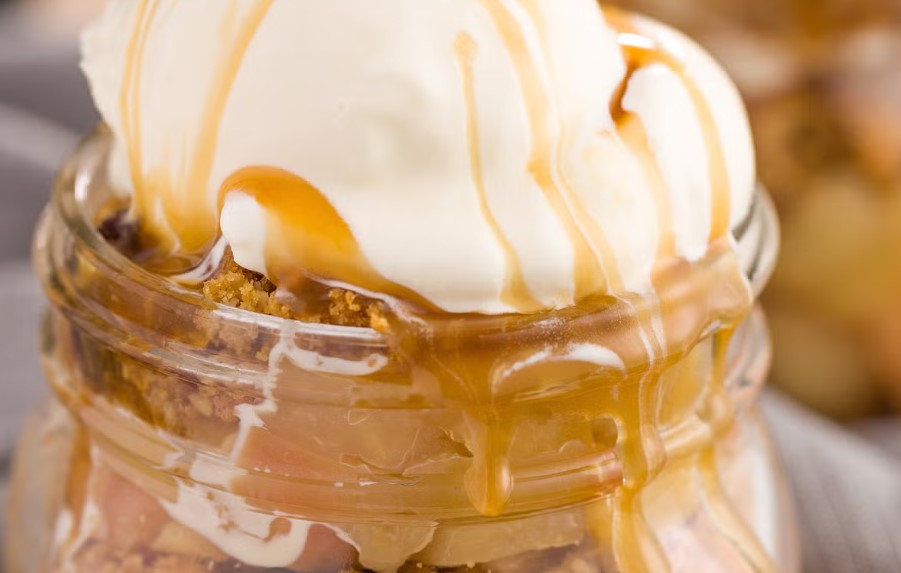
I love how versatile apple pie in a jar can be. When I make a batch, I usually enjoy one warm right out of the oven with a scoop of vanilla ice cream on top—it’s the perfect personal dessert. These jars also make adorable homemade gifts.
I just tie a ribbon around the lid, add a little tag, and they’re ready to share. Sometimes I prep a few ahead of time and keep them in the fridge for a quick treat during the week.
They’re also a fun dessert to bring to parties or picnics since they’re easy to transport and serve. Whether I’m treating myself or surprising someone else, these little pies always hit the spot.
How To Make Apple Pie Jar Recipe?
Recipe Overview
Preparation Time: 30 minutes
Cooking Time: 40 minutes
Total Time: 1 hour 10 minutes
Course: Dessert
Difficulty: Easy
Cuisine: American
Yield: 4 mini pies (4 oz jars)
Equipment Needed
- 4 oven-safe 4 oz mason jars
- Mixing bowls
- Saucepan
- Rolling pin
- Round cookie cutter (~3¼-inch size)
- Baking sheet
- Pastry brush
Ingredients
For the Apple Filling:
- 2 Honeycrisp or Granny Smith apples, peeled and finely chopped
- ½ cup finely chopped pitted dates
- 2 teaspoons lemon juice
- 1½ tablespoons all-purpose flour
- 2 tablespoons granulated sugar
- ¾ teaspoon ground cinnamon
- ⅛ teaspoon salt
- 1 tablespoon unsalted butter
- Splash of water (if needed)
For the Crust & Assembly:
- 1 refrigerated pie crust (rolled sheet)
- 1 egg, lightly beaten
- 1–2 teaspoons turbinado sugar for topping
Step-by-Step Instructions
1. Prepare the Apple Filling
Peel and chop the apples into small, bite-sized pieces. In a large bowl, combine the chopped apples, finely chopped dates, and lemon juice. In a separate bowl, whisk together the flour, sugar, cinnamon, and salt. Add the dry mixture to the apple mixture and toss to coat evenly. In a saucepan over medium heat, melt the butter. Add the apple mixture and cook, stirring occasionally, until the apples are tender and the mixture is thickened. If the mixture seems too dry, add a splash of water. Remove from heat and let it cool slightly.
2. Prepare the Crust
Preheat your oven to 350°F (175°C). Roll out the pie crust on a lightly floured surface. Using a round cookie cutter (~3¼-inch size), cut out circles to fit the bottom and top of your mason jars. Press the bottom crust circles into the base of each jar, ensuring they fit snugly.
3. Assemble the Pies
Spoon the cooled apple filling into each jar, filling them nearly to the top. Place the top crust circles over the filling, pressing the edges gently to seal. Using a sharp knife, make a small slit in the center of each top crust to allow steam to escape. Brush the tops with the beaten egg and sprinkle with turbinado sugar for a delightful crunch.
4. Bake
Place the jars on a baking sheet and bake in the preheated oven for 35–40 minutes, or until the crusts are golden brown. Once baked, remove from the oven and allow them to cool slightly before serving.
Nutrition Facts (Per Serving)
- Calories: Approximately 350 kcal
- Carbohydrates: 50g
- Protein: 3g
- Fat: 15g
- Fiber: 3g
- Sugar: 25g
- Sodium: 150mg
Note: Nutritional values are approximate and may vary based on specific ingredients used.
Serving Suggestions
These apple pie jar recipe in a Jar are delightful on their own, but for an extra indulgent treat, serve them warm with a scoop of vanilla ice cream or a dollop of whipped cream. They also make charming gifts—simply tie a ribbon around the jar and add a personalized tag.
Tips and Variations
- Fruit Variations: Feel free to substitute apples with pears or peaches for a different flavor profile.
- Spice It Up: Add a pinch of nutmeg or allspice to the filling for added warmth.
- Crumb Topping: Instead of a top crust, sprinkle a mixture of oats, brown sugar, and butter for a streusel topping.
- Make Ahead: Prepare the filling a day in advance and store it in the refrigerator until ready to assemble.
Health Benefits
Apples are a great source of dietary fiber and vitamin C, contributing to heart health and immune support.
Using dates adds natural sweetness, reducing the need for excessive added sugars. By controlling the ingredients, you can create a dessert that’s both delicious and mindful of health.
How Long Do The Jars Last?
When I make apple pie jar recipe in a jar, I usually store the extras in the fridge. They stay fresh for about 4 to 5 days if I keep the lid on tightly.
If I want them to last longer, I freeze them before baking. That way, I can just pop one in the oven whenever I’m craving something sweet. Frozen, they can last up to 2 months.
I always make sure to let the jar come to room temperature for a few minutes before baking straight from the freezer, just to avoid any cracking. As long as I store them properly, these little pies are ready whenever I need a quick, cozy dessert.
How To store
When I store apple pie in a jar, I make sure the jars are completely cool before sealing them. If they’re warm, the condensation can make the crust soggy. I screw on the lids tightly and keep them in the refrigerator for up to 5 days.
If I want to store them longer, I freeze them before baking. I just cover each jar tightly with plastic wrap and then seal with the lid. When I’m ready to bake, I let the jar sit out for 15–20 minutes so it doesn’t go into the oven too cold.
It keeps the glass from cracking. This way, I always have a cozy little dessert waiting for me—no rush to eat it all at once.
Note
Ensure that the mason jars you use are oven-safe to prevent cracking during baking. Always handle hot jars with care, using oven mitts to avoid burns.
Conclusion
Making apple pie jar recipe in a jar lets me enjoy all the comfort of a homemade dessert without the fuss of a full-sized pie. I love how simple it is to put together, and it always feels a little extra special when I serve it in a jar.
Whether I’m gifting it to someone or treating myself, it never fails to make me smile. If you’re like me and crave something warm, sweet, and cozy, this little pie is just what you need. Give it a try—I know you’ll fall in love with it just like I did.