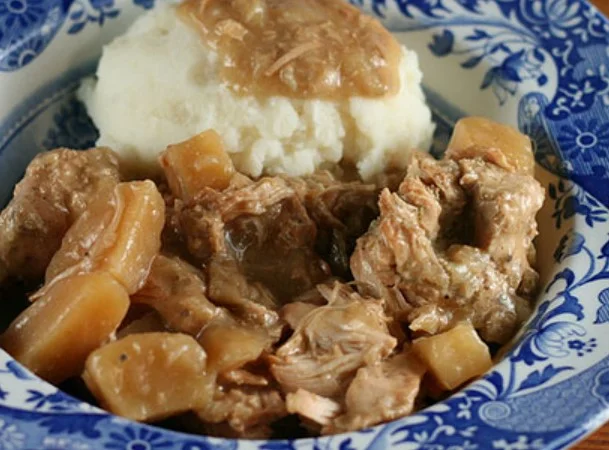
I’ve always loved having home-cooked meals ready in a flash, and that’s why I swear by this chicken and gravy canning recipe. It gives me tender chicken, rich gravy, and pure comfort—right from my pantry.

Pressure canning lets me store these jars for months without losing flavor. I started canning to cut down on store-bought shortcuts, and now I can’t imagine my kitchen without them.
If you’re looking for a reliable, delicious way to preserve chicken and gravy, I’ll walk you through exactly how I do it—step by step, with tips I’ve learned from canning it myself.
How To Make Chicken And Gravy Canning Recipe
🕒 Recipe Overview
- Preparation Time: 30 minutes
- Cooking Time: 1 hour 30 minutes
- Resting Time: 12–24 hours (for jars to cool and seal)
- Total Time: Approximately 14 hours
- Course: Main Course
- Difficulty: Intermediate
- Cuisine: American
- Yield: 5 quart-sized jars or 10 pint-sized jars
🧰 Equipment Needed
- Pressure canner with rack
- 5 wide-mouth quart jars (or 10 pint jars)
- Canning lids and bands
- Canning funnel
- Ladle
- Bubble remover or spatula
- Jar lifter
- Clean dish towel
- Large mixing bowl
- Large stockpot
🧂 Ingredients
- 6 pounds boneless, skinless chicken, cubed
- 3 cups potatoes, peeled and diced
- 2 cups carrots, chopped
- 2 cups celery, chopped
- 2 cups onions, chopped
- 6 teaspoons salt
- 3 teaspoons freshly ground black pepper
- 6 teaspoons poultry seasoning
- ¾ cup dry white wine or white vinegar
- 1 quart chicken broth, heated to a simmer
🍳 Step-by-Step Instructions
1. Prepare the Pressure Canner
Add two inches of water to the pressure canner. Place clean jars inside and begin heating them to prevent breakage when hot food is added.
2. Prepare the Ingredients
In a large bowl, combine the cubed chicken, diced potatoes, chopped carrots, celery, and onions. Add salt, pepper, poultry seasoning, and white wine or vinegar. Mix thoroughly to ensure even distribution of seasonings.
3. Heat the Broth
In a separate pot, bring the chicken broth to a simmer. This hot liquid will be used to fill the jars after packing them with the chicken and vegetable mixture.
4. Fill the Jars
Using a canning funnel, pack the chicken and vegetable mixture into the hot jars, leaving a one-inch headspace. Pour the hot broth over the mixture, maintaining the one-inch headspace. Use a bubble remover to eliminate air pockets, adding more broth if necessary.
5. Seal the Jars
Wipe the rims of the jars with a clean, damp cloth to remove any residue. Place the lids on the jars and screw on the bands until fingertip-tight.
6. Process in the Pressure Canner
Place the sealed jars into the pressure canner. Lock the lid and bring the canner to the appropriate pressure for your altitude (refer to your canner’s manual). Once the desired pressure is reached, process quart jars for 90 minutes and pint jars for 75 minutes.
7. Cool and Store
After processing, turn off the heat and allow the canner to depressurize naturally. Once pressure has returned to zero, carefully remove the lid, and use a jar lifter to place the jars on a towel-lined surface. Let them cool undisturbed for 12–24 hours. Check seals before storing; any unsealed jars should be refrigerated and used promptly.
💡 Tips and Variations
- Thickening the Gravy: For a thicker gravy, after heating the contents of a jar, mix a tablespoon of flour with a small amount of cold water to create a slurry. Stir this into the simmering mixture until it reaches the desired consistency.
- Adding Herbs: Feel free to add herbs like thyme or rosemary to the mixture before canning for additional flavor.
- Spicy Variation: Incorporate a diced jalapeño or a pinch of red pepper flakes for a spicier version.
🥦 Health Benefits
Canning your own chicken and gravy allows you to control the ingredients, ensuring a healthier meal option:
- High Protein: Chicken is an excellent source of lean protein, essential for muscle maintenance and overall health.
- Rich in Vitamins: The included vegetables provide vitamins A and C, as well as dietary fiber.
- Low in Preservatives: Home canning eliminates the need for artificial preservatives found in many store-bought options.
🏺 How To Store Chicken And Gravy Canning Recipe
After I finish pressure canning and the jars have cooled completely, I always double-check the seals. Once I know they’re sealed tight, I label each jar with the date and store them in a cool,
dark place—like my pantry or a cupboard away from any heat. I keep them off the floor and out of direct sunlight to protect the flavor and texture.
This chicken and gravy canning recipe stays shelf-stable for up to 12 months, but I try to use mine within 6 to 8 months for the best results. If a jar doesn’t seal, I refrigerate it right away and use it within 3 to 4 days.
📝 Note
Always ensure that all vegetables, especially those grown underground like potatoes and carrots, are thoroughly cleaned and peeled before canning. This reduces the risk of contamination from soil-borne bacteria.
✅ Conclusion
Canning chicken and gravy has completely changed the way I stock my pantry. I don’t have to rely on store-bought sauces or frozen dinners anymore—I’ve got jars of real, homemade comfort ready whenever I need them.
This recipe gives me peace of mind and a warm meal at the end of a long day. If you’ve never tried canning something like this, give it a go.
nce you taste your own savory chicken and gravy straight from the jar, you’ll see why I keep coming back to this recipe. It’s simple, satisfying, and always worth the effort.
