There’s something magical about red velvet. Maybe it’s the rich color, or that subtle cocoa flavor wrapped in buttery sweetness. For me, it’s comfort in every slice.
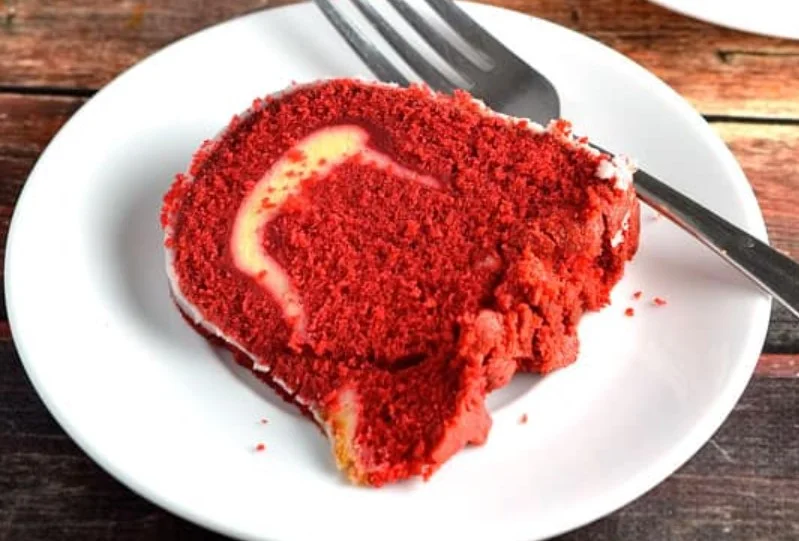
This red velvet pound cake takes all the charm of classic red velvet and gives it a dense, moist texture that melts in my mouth.
It’s perfect when I want something elegant but easy—something that looks as good as it tastes. Whether I’m baking it for a celebration or just because I need a treat, this cake never disappoints.
How To Make Red Velvet Pound Cake Recipe?
- Prep Time: 20 minutes
- Cook Time: 1 hour 5 minutes
- Total Time: 1 hour 25 minutes
- Course: Dessert
- Cuisine: American (Southern-inspired)
- Difficulty: Easy
- Yield: 1 loaf (10–12 slices)
Equipment I Use
- Hand mixer or stand mixer
- Mixing bowls (2 sizes)
- 9×5-inch loaf pan
- Parchment paper
- Spatula
- Measuring cups & spoons
- Whisk
- Cooling rack
- Oven
Ingredients I Use
For the Cake:
- 1 cup unsalted butter, softened
- 1 ¾ cups granulated sugar
- 4 large eggs
- 2 ½ cups all-purpose flour
- 1 tablespoon unsweetened cocoa powder
- ½ teaspoon baking soda
- ½ teaspoon salt
- 1 cup buttermilk
- 1 tablespoon red food coloring (I prefer gel)
- 1 teaspoon distilled white vinegar
- 2 teaspoons vanilla extract
Optional Cream Cheese Glaze:
- 4 oz cream cheese, softened
- 1 cup powdered sugar
- 2 tablespoons milk (more if needed)
- ½ teaspoon vanilla extract
Step-By-Step Instructions
1. Preheat the Oven
I start by setting my oven to 325°F (160°C). Then I grease my loaf pan and line it with parchment. That always gives me clean edges and easy release.
2. Cream the Butter and Sugar
In my mixing bowl, I beat the butter until smooth. Then I slowly add sugar and beat until light and fluffy—this takes about 4 minutes.
3. Add the Eggs
I add the eggs one at a time, beating well after each addition. This step makes the batter creamy and rich.
4. Mix Dry Ingredients
In another bowl, I whisk together the flour, cocoa powder, salt, and baking soda.
5. Combine Wet Ingredients
In a measuring cup, I stir the buttermilk, food coloring, vinegar, and vanilla until smooth and bright.
6. Alternate Mixing
I add the dry and wet ingredients to the butter mixture in turns—starting and ending with flour. I mix just until combined. Overmixing ruins the texture, so I stop once I don’t see streaks.
7. Pour and Bake
I pour the thick batter into my loaf pan, smooth the top, and bake for about 60 to 70 minutes. I check with a toothpick—it should come out clean.
8. Cool It Down
Once baked, I cool the cake in the pan for 10 minutes. Then I transfer it to a wire rack until fully cooled.
9. Glaze It (Optional)
For a glaze, I mix cream cheese, powdered sugar, milk, and vanilla until silky. Then I drizzle it over the cooled cake. Sometimes I double the glaze because I just can’t resist.
Nutrition Facts (Per Slice – Approx.)
- Calories: 360
- Fat: 19g
- Saturated Fat: 11g
- Carbs: 42g
- Sugar: 27g
- Protein: 5g
- Fiber: 1g
- Sodium: 220mg
Serving Suggestions
- I serve it chilled with cream cheese glaze or freshly whipped cream.
- Sometimes I add berries on top—especially raspberries or strawberries.
- If I want extra indulgence, I toast a slice lightly and spread a little butter.
Tips and Variations
- Don’t Skip Vinegar: It reacts with the baking soda and adds tenderness.
- Room Temp Ingredients: Butter, eggs, and buttermilk should all be at room temp. That helps everything blend perfectly.
- Mini Cakes: I use the same batter to make mini pound cakes for gifts. I just reduce the baking time.
- Want a Deeper Red? Gel food coloring gives a bold, rich color without watering the batter down.
- No Buttermilk? I mix 1 tablespoon vinegar with 1 cup of milk and let it sit for 5–10 minutes.
Health Benefits
This cake isn’t exactly health food, but it does offer joy and comfort. Eggs provide protein, and cocoa gives a small dose of antioxidants. But more than that—this cake brings peace to my soul. A little self-love in every bite.
FAQ
Can I make this red velvet pound cake without food coloring?
Yes, I can leave out the food coloring if I prefer. The cake will still taste delicious, but it won’t have that classic red hue. I sometimes replace the food coloring with a tablespoon of beet juice for a natural alternative.
Why do I need vinegar in red velvet cake?
I use vinegar to react with the baking soda. This helps the cake rise properly and adds a slight tang that enhances the red velvet flavor. It’s a small amount, but it makes a big difference.
Can I use cake flour instead of all-purpose flour?
Yes, I’ve tried it with cake flour and it gives a slightly softer texture. If I use it, I replace all-purpose flour with 2 ¾ cups of cake flour.
How do I know when the cake is done?
I insert a toothpick into the center of the cake. If it comes out clean or with a few moist crumbs, it’s ready. Overbaking dries it out, so I keep an eye on it after the 60-minute mark.
Can I freeze red velvet pound cake?
Absolutely. I let it cool completely, then wrap it tightly in plastic and foil. It stays fresh in the freezer for up to 2 months. When I’m ready to eat, I thaw it overnight in the fridge.
What’s the best way to store leftovers?
I store leftover slices in an airtight container. At room temperature, it lasts for 2 days. In the fridge, it stays moist for up to 5 days.
Can I turn this into cupcakes or mini loaves?
Yes! I divide the batter into mini loaf pans or cupcake molds. I reduce the baking time—cupcakes take about 20–25 minutes, mini loaves around 35–40.
Note
Always let the cake cool completely before slicing. If I try too soon, it crumbles. I store leftovers in an airtight container at room temperature for two days—or in the fridge for up to five.
Conclusion
This red velvet pound cake brings the richness of tradition and the charm of a Southern classic into one delicious loaf.
It’s the kind of cake that makes me feel proud when I slice it—and even prouder when someone asks for seconds.
If you love buttery cakes with a hint of cocoa and a pop of color, then this one belongs in your recipe box.
Red Velvet Pound Cake Recipe
Ingredients
Equipment
Method
- I start by setting my oven to 325°F (160°C). Then I grease my loaf pan and line it with parchment. That always gives me clean edges and easy release.
- In my mixing bowl, I beat the butter until smooth. Then I slowly add sugar and beat until light and fluffy—this takes about 4 minutes.
- I add the eggs one at a time, beating well after each addition. This step makes the batter creamy and rich.
- In another bowl, I whisk together the flour, cocoa powder, salt, and baking soda.
- In a measuring cup, I stir the buttermilk, food coloring, vinegar, and vanilla until smooth and bright.
- I add the dry and wet ingredients to the butter mixture in turns—starting and ending with flour. I mix just until combined. Overmixing ruins the texture, so I stop once I don’t see streaks.
- I pour the thick batter into my loaf pan, smooth the top, and bake for about 60 to 70 minutes. I check with a toothpick—it should come out clean.
- Once baked, I cool the cake in the pan for 10 minutes. Then I transfer it to a wire rack until fully cooled.
- For a glaze, I mix cream cheese, powdered sugar, milk, and vanilla until silky. Then I drizzle it over the cooled cake. Sometimes I double the glaze because I just can’t resist.