 Kitchen Tools
Can You Use a Mandoline Slicer Safely Without Cutting Your Fingers?
 By the CookClear writers
Checked against manufacturer instructions and test kitchen reviews
 Clear Answer
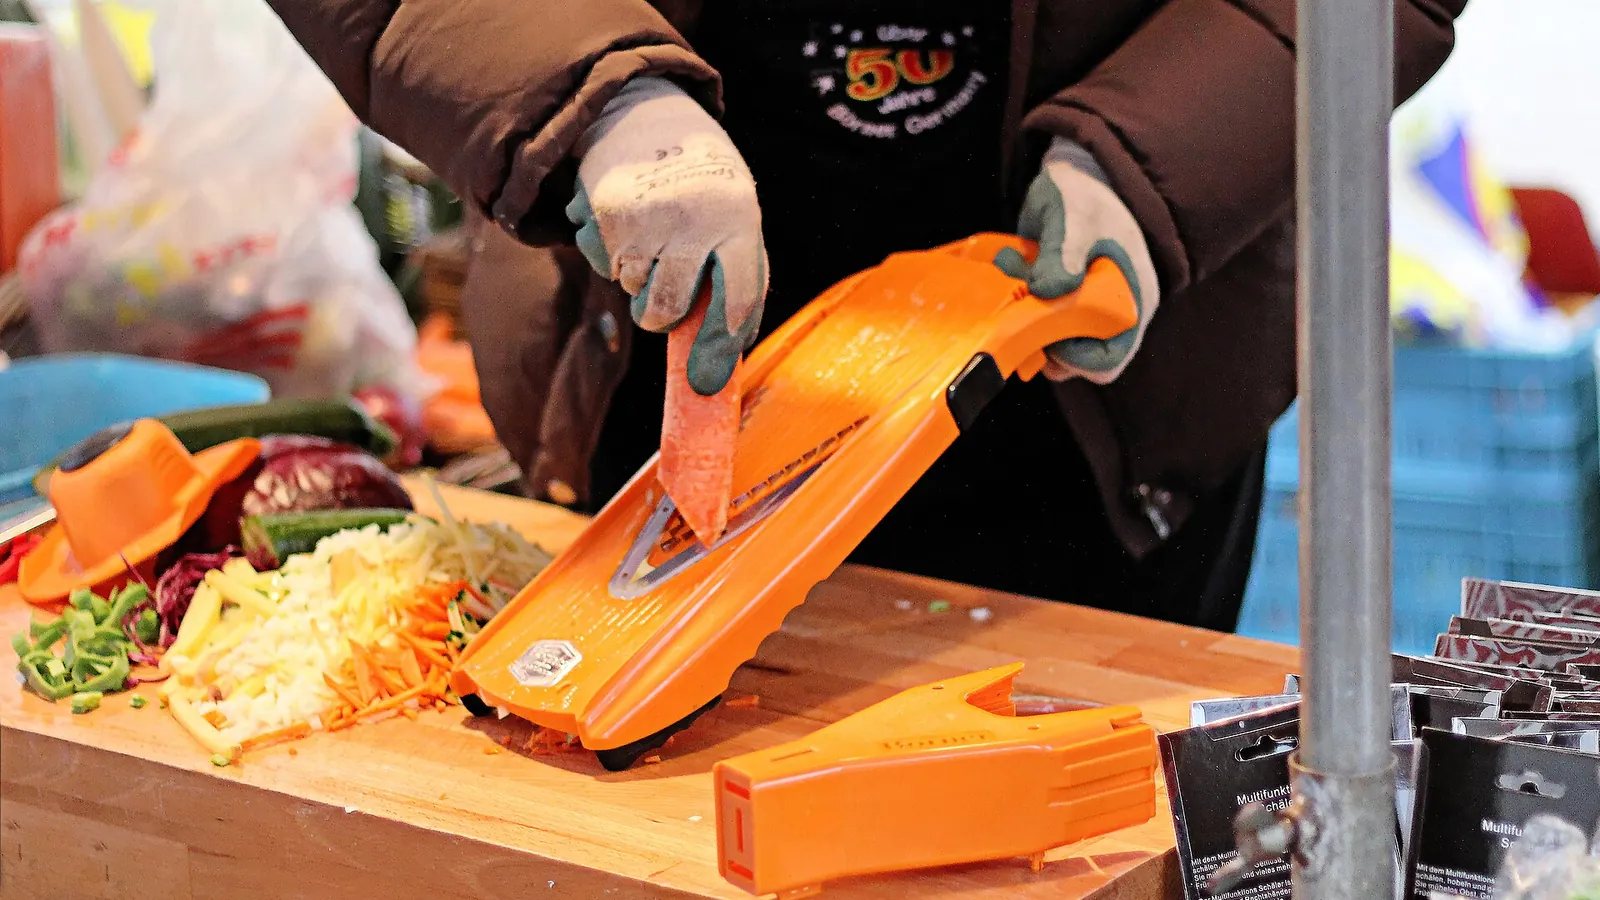
Yes, a mandoline is worth owning if you regularly need lots of thin, identical slices, and it is safe if your bare fingers never go near the blade. Wear a cut-resistant glove on the hand holding the food or use a guard that grips firmly, and stop before the food gets small. If you slice a single cucumber once a month, a sharp chef's knife is the better tool.
What makes a mandoline more dangerous than a knife?
A knife moves and your hand stays put. A mandoline flips that: the blade is fixed, and your hand is the thing moving, pushing food toward an edge you cannot see. Every stroke brings your fingers closer to the blade than the last one, because the food gets shorter each pass.
 On the menu9 questions
The blade is also very sharp and very fast. A mandoline can cut a slice thinner than you could ever manage by hand, and that same efficiency means a slip takes off a slice of fingertip or knuckle just as cleanly. People rarely get hurt in the first few strokes. They get hurt on the last few, when the potato is down to a nub and they think one more pass will be fine.
Distraction and rushing make it worse. Chefs quoted by TODAY.com warn against using one while distracted and recommend going slow, especially at first.
When is a mandoline actually worth it?
The tool earns its drawer space when you need uniform slices or a lot of them. Thin, even slices cook at the same rate, which is the whole point in a gratin, chips, or a layered tart. Doing that with a knife is possible, just slow. Even pieces also matter when roasting vegetables crisp.
| Task | Mandoline or knife? | Why |
|---|---|---|
| Potato gratin or scalloped potatoes | Mandoline | Paper-thin, even slices cook through at the same time |
| Homemade potato or beet chips | Mandoline | Uneven chips burn at the edges and stay soft in the middle |
| Shaved fennel, radish, or cabbage slaw | Mandoline | Very thin slices that are hard to get by hand |
| Cucumber pickles in a big batch | Mandoline | Speed and consistency across a full jar or two |
| Julienned carrots for a large salad | Mandoline (with julienne blade) | Fast, matching matchsticks |
| One onion for tonight's dinner | Knife | Setup and cleanup take longer than the cutting |
| Soft tomatoes or ripe peaches | Knife | Soft food tears and slips on the platform |
| Small items like a single garlic clove or shallot | Knife | Too small to hold safely on a mandoline |
Microplane's guidance, quoted by TODAY.com, follows the same logic: reach for the mandoline for uniform thickness, speed, specialty cuts, or hard vegetables, and use a good chef's knife for precision, small quantities, or when safety is a concern. Weigh it against the other kitchen tools you would use more often before buying.
Cut-resistant glove or hand guard: which one should you trust?
Use a cut-resistant glove every time. A hand guard is a good second layer, but on its own it often fails.
America's Test Kitchen points out that many guards cannot both protect your hand and hold food securely, and that even good ones struggle with long items like a whole cucumber or zucchini. When a guard's spikes do not bite, food wobbles, and people abandon the guard halfway through. That is usually when the cut happens.
A glove has no such problem. It goes on the hand that holds the food, and it stays on for the whole job. Several professional cooks in the TODAY.com piece wear one routinely; one wears three layered gloves when working fast.
What cut level to look for
Cut-resistant gloves sold in the US are usually rated on the ANSI/ISEA 105 scale, from A1 (lowest) to A9 (highest). The rating reflects how many grams of force a blade needs to cut through the material in a standard test.
| ANSI cut level | Grams of force to cut through |
|---|---|
| A1 | 200 to 499 |
| A2 | 500 to 999 |
| A3 | 1,000 to 1,499 |
| A4 | 1,500 to 2,199 |
| A5 | 2,200 to 2,999 |
| A6 | 3,000 to 3,999 |
| A7 to A9 | 4,000 and up |
A higher number buys more protection but usually a stiffer, bulkier glove. Pick one that fits snugly; a loose glove can bunch up and catch on the blade. A cut-resistant glove can still be cut, so it gives you a margin of error and nothing more.
How to set up and slice, step by step
Most mandoline injuries come from a bad setup or the final few strokes.
- Clear a flat, dry surface. The tool must not skid. Set it on a dry counter or a damp towel, and keep the area free of clutter, bowls, and phones.
- Set the thickness before food goes near it. Adjust the platform with your hands well away from the blade. If yours has a blade cover or retractable blade, keep it engaged until you are ready.
- Put on the glove. It goes on the hand that holds the food. If you also use the guard, attach the food to it now.
- Trim food so it sits flat. Halve round things like potatoes, onions, or apples and lay the cut side down. Firm fruit slices cleanest, so pick crisp apples over mealy ones. A rolling vegetable is the fastest way to lose control. Slicing onions? A few tricks help stop the tears.
- Work toward one side of the platform. ATK notes the platform flexes less near the walls, so you get steadier, more even slices off-center.
- Use smooth, moderate strokes. Too slow and the food snags; too fast and you lose control. Press with the flat of your palm rather than your fingertips, and keep your fingers curled away from the leading edge. Chef Caroline Choe, in TODAY.com, recommends keeping about half an inch between your hand and the blade at all times.
- Clear buildup as you go. Slices piling up under the blade make new food jam. Stop, move the slices, then continue.
- Never force a jam. If food sticks, take your hand away and nudge it loose with a knife handle or wooden spoon, never your fingers.
- Stop while a real chunk remains. When the piece gets down to roughly the width of your palm, quit. Slice the end by hand with a knife, or save it for stock.
That last step is the one people skip. One cook in the TODAY.com piece put it bluntly: never push your luck by slicing until the very end.
Why a dull blade is more dangerous than a sharp one
It sounds backward, but a sharper blade is safer. A dull edge needs more pressure, food sticks or skips, and you end up pushing harder or reaching in to clear it. Both put your hand closer to the edge.
If your mandoline has removable blades, keep them sharp or replace them when they stop slicing cleanly. Many fixed-blade models cannot be sharpened, so once they dull, the whole tool needs replacing. A sign it is time: food catches halfway through a stroke, slices tear instead of falling cleanly, or you notice yourself leaning on it. The same holds for your knives, which is where honing versus sharpening comes in.
Cleaning and storing a mandoline without a cut
Plenty of mandoline injuries happen at the sink, not the cutting board. The blade is still sharp, it is now wet and slippery, and it may be hidden under suds.
- Wash it right away and by hand. Do not drop it in a sink full of water where you will reach in blind later. Food also dries in the blade corners if it sits.
- Wipe away from the edge. Use a brush, and move from the spine of the blade outward, never along the cutting edge.
- Dry it immediately, then retract the blade or put the cover on if it has one.
- Store it where nobody grabs it blind. A top shelf or a dedicated spot beats a crowded utensil drawer. One chef quoted by TODAY.com wraps hers before putting it in a knife bag.
- Keep the glove with the mandoline. If they live together, you will use it.
Check the manual before assuming any part is dishwasher safe (the same caution applies to cast iron in the dishwasher). Even when it is, loading a bare blade into a rack you will unload later is its own small hazard.
Which design is easier to use safely?
You do not need a specific brand to slice safely, but some features make it easier.
- A wide, stable base or legs with nonslip feet. Less movement means more control.
- A built-in thickness dial instead of loose inserts, so you are not swapping sharp parts mid-job.
- A blade cover or retracting blade for storage and cleaning.
- A guard with deep, sturdy spikes if you want one. Test it on a halved potato; if it slips, rely on the glove.
- Fewer parts. Every extra blade is one more sharp thing to wash and store, a trade-off that also comes up when deciding if a stand mixer earns its space.
Adjustable models typically go from paper thin up to about a half-inch slice, while simple fixed models usually cut around an eighth of an inch or thinner. If you mostly make gratins and chips, a fixed thin setting may be all you need, and fewer moving parts makes cleanup easier.
What to do if you nick yourself anyway
Small slices are common, even for careful cooks. Stop slicing, set the tool aside, and press a clean cloth firmly on the cut. Most minor cuts stop bleeding with steady pressure for several minutes, after which you can rinse and bandage.
Get medical care if the bleeding does not stop with firm pressure, if a piece of fingertip came off, if the cut is deep or gaping, or if you notice numbness or trouble moving the finger. Throw out any food that got blood on it.
Then look at what went wrong. It is almost always one of three things: no glove, slicing too close to the end, or reaching in to clear a jam. Fix that habit before you use the tool again.
 Setting up a mandoline so you keep your fingertips
Hand position is the hardest part of mandoline safety to take from text, since the risk comes from where your fingers travel on each stroke. ChefSteps shows the setup and the cuts, so you can compare it with the habits above.
ChefSteps Tips & Tricks: Master Your Mandoline
By ChefSteps on YouTube. Their method may vary a little from ours. Watch on YouTube
- Look at where the holding hand sits and compare it with the glove and the palm-pressing advice above.
- Notice how the food is trimmed and how the thickness is set before slicing begins.
- Watch for when slicing stops on the last piece, and compare it with quitting once the piece is about the width of your palm.


